How to use best multitasking features in window 11
How to use best multitasking features in Window 11. which should come as no surprise given that it was mostly created during the epidemic.
In 2020, millions of individuals made the abrupt switch to working remotely, frequently using tiny laptop displays in place of their standard PCs at the office. People still want an operating system that can manage numerous apps at once, regardless of where they are, even under the current hybrid working paradigm that many firms have embraced.
How to use best multitasking features in window 11:
Windows 11 mostly does that. There are some excellent multitasking options, but it’s not always obvious when and how to use them. We’ll go over all the information you need to know about the four most helpful in this post.
Task View:
Although Task View was first launched with Windows 10, it is still a helpful tool for keeping various tasks (or business and personal information) apart from one another. Any open application is unique to a given “desktop,” so it won’t show up if you launch a new one.
Simply click the Task View icon in the taskbar to begin. It resembles a rectangle stacked on top of one another and is typically seen between the Teams chat and the search bar. You may also use the shortcut Windows Key + Tab.
The screen that appears next should resemble the one below. To establish a second desktop, click the “New desktop” (+) button, and then click to begin using it.
Read more: How to download and use Microsoft Word for free
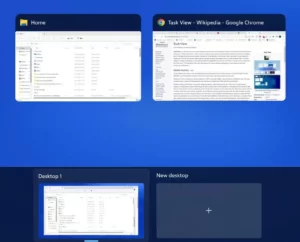
You can also move desktops about in Task View to rearrange them, and you can right-click each one to rename it or alter its backdrop.
A list of all the open apps is also available in Task View. This is a simple method for fast closing a few or finding anything specific.
Snap Layouts:
One of the most talked-about innovations of Windows 11 is Snap Layouts and for good reason. Any split-screen multitasking is made simple to set up and customize using this.
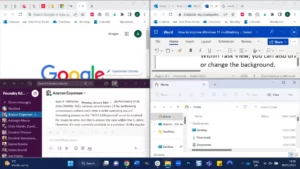
Open any program you want to have in the layout, then select it and mouse over the minimize or maximize icon to get started. There are four choices available to you, each with two to four open windows.
The window will automatically snap into place once you click any desired location. Then you’ll be invited to fill in the empty spaces with any open apps. Launch the desired app as normal if it hasn’t already been opened, and then use the hover method to drop it into position.
How to use best multitasking features:
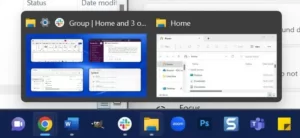
A “Snap Group” that may be utilized independently of any other app will now be available to you. Simply move your mouse over any of the applications in the layout to see a group appear.
FancyZones:
Although Snap Layouts is fantastic, there are only four possibilities available. The size of each window may be changed, but that’s about it.
Enter FancyZones, a Microsoft PowerToys utility that is optional. Although they are intended for power users, as the name says.
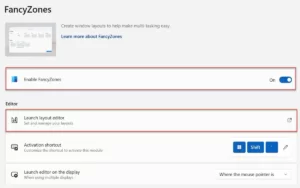
Download and install Microsoft PowerToys from the Microsoft Store to get going. Open the app, then pick “FancyZones” by clicking the three bars in the top-left corner. Ensure that the toggle is in the “on” position.
Click “Launch layout editor” at this time. The highlight distance—the distance between zones before they snap together—and, in most circumstances, the space around zones may be changed for each of the five primary settings (through the pen symbol). Another choice is to make something wholly original.
Time to begin utilizing your desired layout:
- Reduce or minimize all open windows so that you can only view the desktop
- Open a new window to be added to the design.
- When you see the desired layout, continue to hold down the Shift key while dragging the window (using the title bar at the top).
- It will snap into place if you drop it into any of the marked areas.
- For any more windows, repeat steps 3 through 4. When everything is finished, you should see something similar to the screenshot below.

There are many more personalization choices to select from under the FancyZones area of the PowerToys Settings app. It’s worthwhile to test out a few and discover one works best for you.
Read more: How to Attach Files to Emails on an iPhone
Keep the same arrangement after restarting:
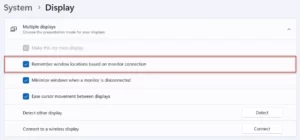
If you have many displays, there is certainly a particular app arrangement that suits you. Windows 11 has the ability to remember this so you don’t have to do it manually every time your device restarts.
Just check the box next to “Remember window positions depending on monitor connection” in Settings > System > Display > Multiple Displays.


4 Comments