How to benchmark and speed test an Android phone

How to benchmark and speed test an Android phone. we test a lot of Android smartphones. It offers measures for visual performance, battery life, and other areas. It’s an excellent method to examine how phones compare in terms of raw power. We’ll describe how we do it so you can replicate it at home and compare your phone to others. Here We give an idea about how to benchmark and speed test an Android phone.
The procedure is simple and primarily relies on free applications.
Are the results of benchmark tests useful?
Prior to testing, keep in mind that while benchmarks may offer helpful data, they shouldn’t be the primary means of evaluating performance. While your phone may or may not do well in artificial testing, the true test is how it functions for you on a daily basis in everyday situations.
Benchmarking is only an unbiased way to assess how your phone compares against others, without the added benefit of bragging rights.
Apps required to test an Android phone:
You’ll need a few applications to do the tests in order to obtain an accurate image of how your phone works. We employ the following:
- Geekbench 5
- GFXBench
- PCMark for Android
Geekbench 5 for Android:
An SoC, or system on chip, is the brains of your smartphone. Phones often employ a single chip that integrates everything, in contrast to a computer where the CPU, GPU, and other components are all separate.
The core computation is still being done by a conventional CPU. A phone’s CPU is made up of many cores, just like desktop and laptop computers. Eight CPU cores are a common feature of top Android devices nowadays, however, there are many combinations. You should use Geekbench 5 to assess CPU performance since it can display both single-core and multi-core activity speeds. We focus on the multi-core result the most because it more accurately represents the performance of actual apps.
On your phone, download Geekbench, then adhere to the instructions below.
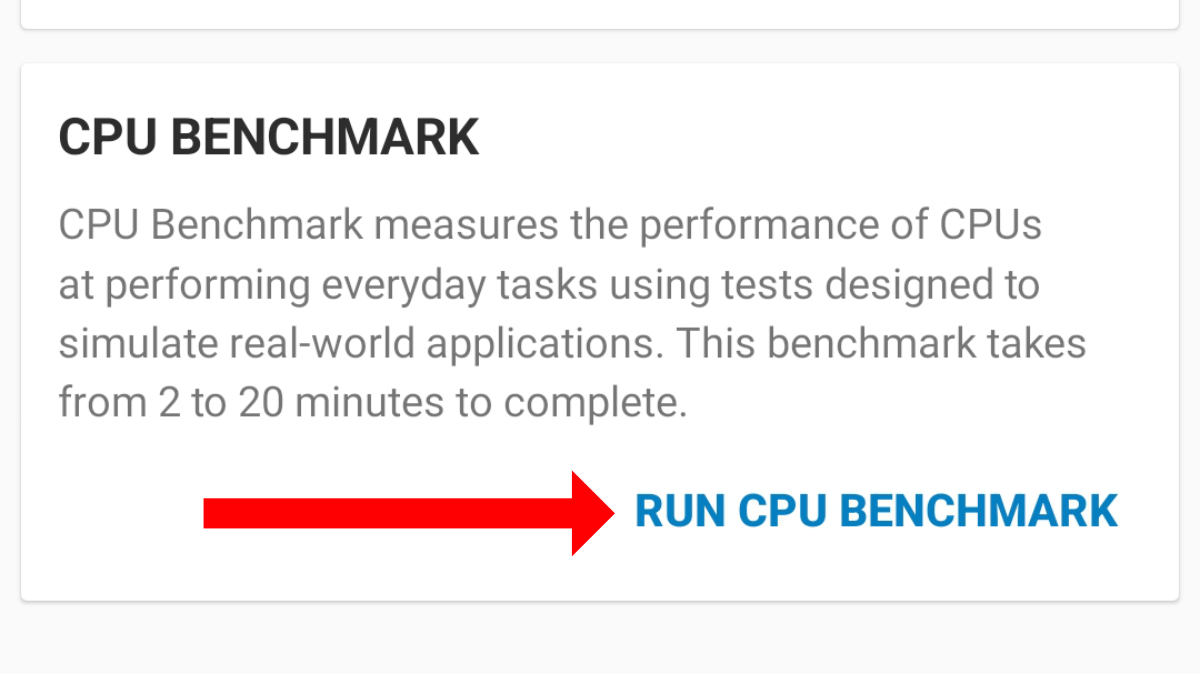
Open Geekbench:

You must hit the Run CPU Benchmark option at the bottom of the screen to start the test. The process is fully automated, but you should check to make sure your phone is not in a power-saving mode that can skew the findings.
Read more: How to Recover Deleted Texts on iPhone
Check the results:

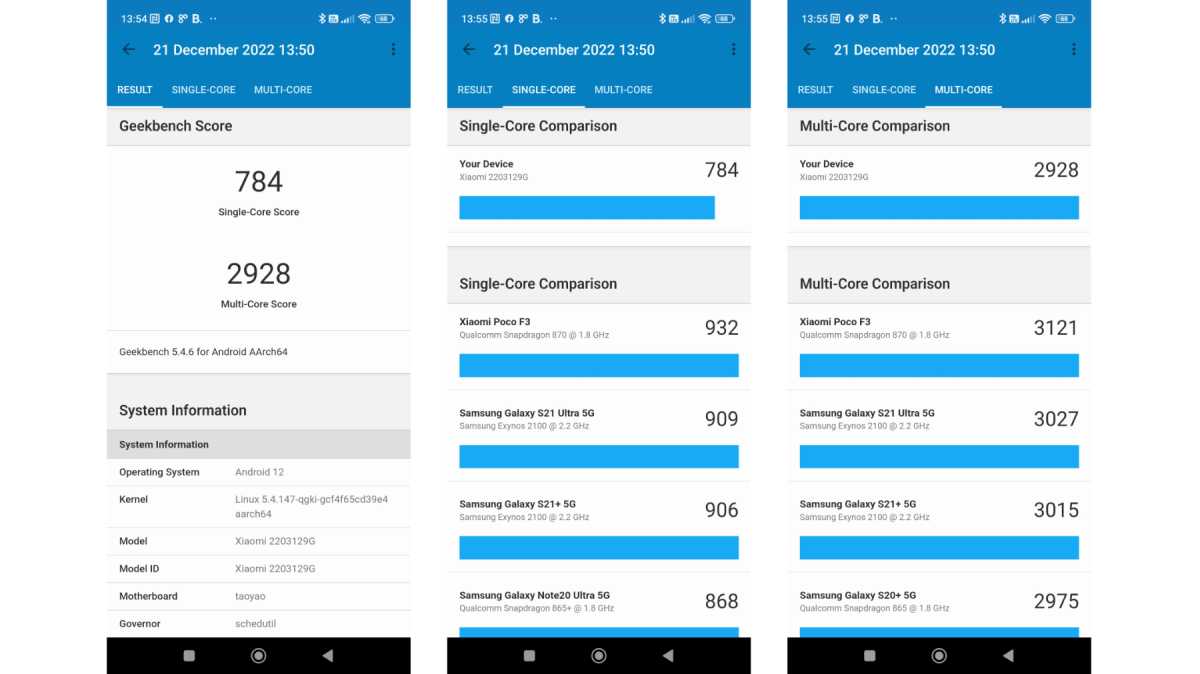
You will be given single- and multi-core performance results when the benchmark is finished. You may scroll down on the Result tab to obtain additional information about the phone’s performance in the different sub-tests. By selecting the Single-Core or Multi-Core tabs, you can see how your phone stacks up against other Geekbench-tested models.
How to evaluate an Android phone’s GPU performance:
The GPU (Graphics Processing Unit), which manages all the displayed pictures you see on your computer, is located next to the CPU (Central Processing Unit). It is helpful to test it because it reveals a phone’s gaming capabilities. You’ll need to utilize GFXBench to accomplish it. So when you download, install, and run the program, perform the following:
Select benchmark tests:
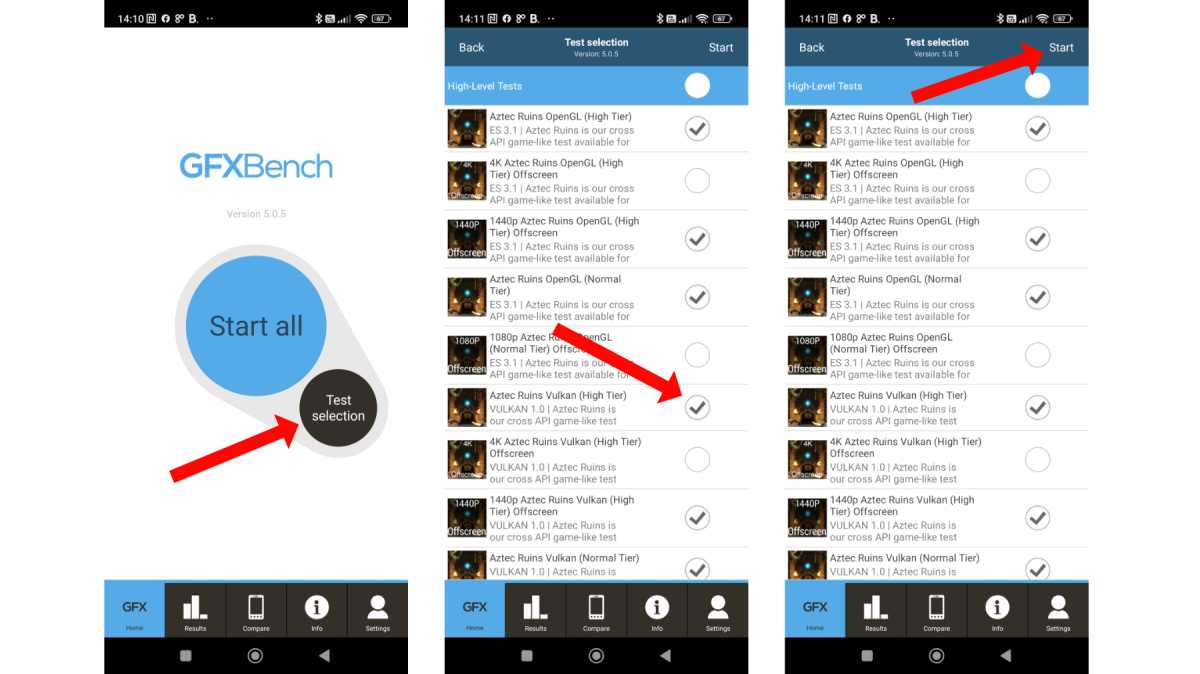
There are many different tests, but not all of them will be necessary. We uncheck the offscreen versions of each test when testing phones since they test the GPU without accounting for the screen resolution of your phone.
Then choose the tests you wish to run by tapping the Test selection button. By default, every checkbox is selected.

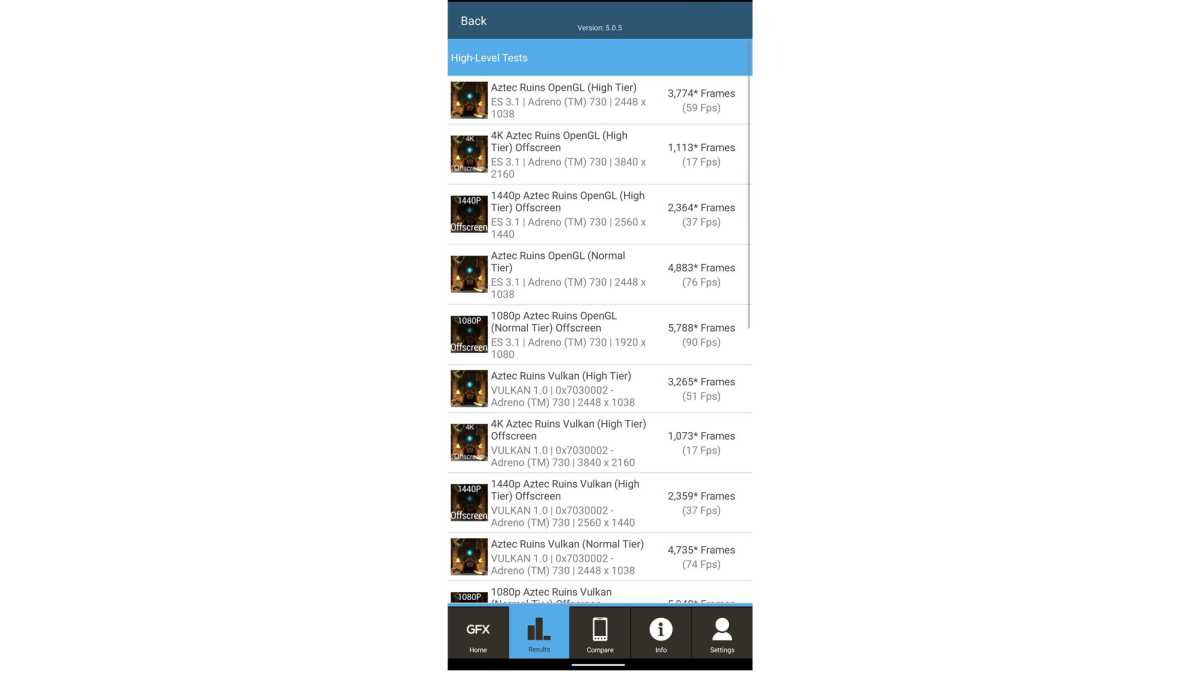
These are the tests we run:


4 Comments